Enabling Amazon Alexa on Raspberry Pi

This post shows steps to enable Amazon Alexa on Raspberry Pi. While there is already a comprehensive tutorial on Amazon Alexa official site [1], this post focuses on doing the same with minimal setup.


Example Setup


Steps
1. Raspberry Pi Setup
1-1. Setup headress Raspberry Pi.

1-2. Connect the speaker and the microphone on Raspberry Pi.

1-3. Make sure the speaker is working. The command below can be used for speaker output test. To end the test, press Ctrl-C.

speaker-test -t wav

1-4. Check if the microphone is working. First, record some audio from the microphone by the command below.

arecord --format=S16_LE --duration=5 --rate=16000 --file-type=raw out.raw -D sysdefault:CARD=1

1-5. Next, play the recorded audio by the command below.

aplay --format=S16_LE --rate=16000 out.raw

If everything goes right, you can hear the recorded audio from the speaker. If the speaker output or microphone input is too low, you can adjust the gain with alsamixer.

alsamixer


2. Register Product Info
2-1. Open a web browser on PC and log in to Amazon Developer. Please sign up if you don’t already have the account.

2-2. Click on “GET STARTED” and then “CREATE PRODUCT”.

2-3. Enter “rpialexa” for both Product Name and Product ID.

2-4. Check on “Device with Alexa built-in”.

2-5. Check on “No” for “Will your device use a companion app?”.

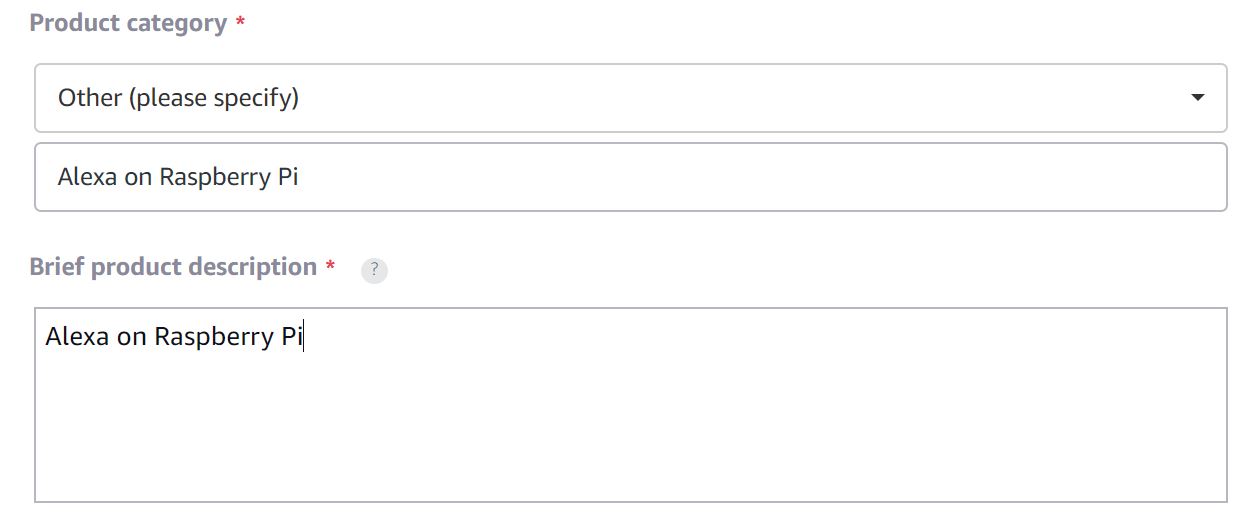
2-6. Select “Other” for “Product category” and enter “Alexa on Raspberry Pi” both for the category description and the product description.
2-7. Check on “Touch-initiated” and “Hands-free”.

2-8. Skip the image section and check on “No” for the rest of the questions, then click on “NEXT”.


3. Create Security Profile
3-1. Click on “Create New Profile”.

3-2. Enter “rpialexa security profile” for “Security Profile Name” and “Security Profile Description”, then click on “NEXT”.

3-3. Select “Other devices and platforms” in “Platform information” section.

3-4. Enter “rpialexa” as Client ID name then clock on “GENERATE ID”.
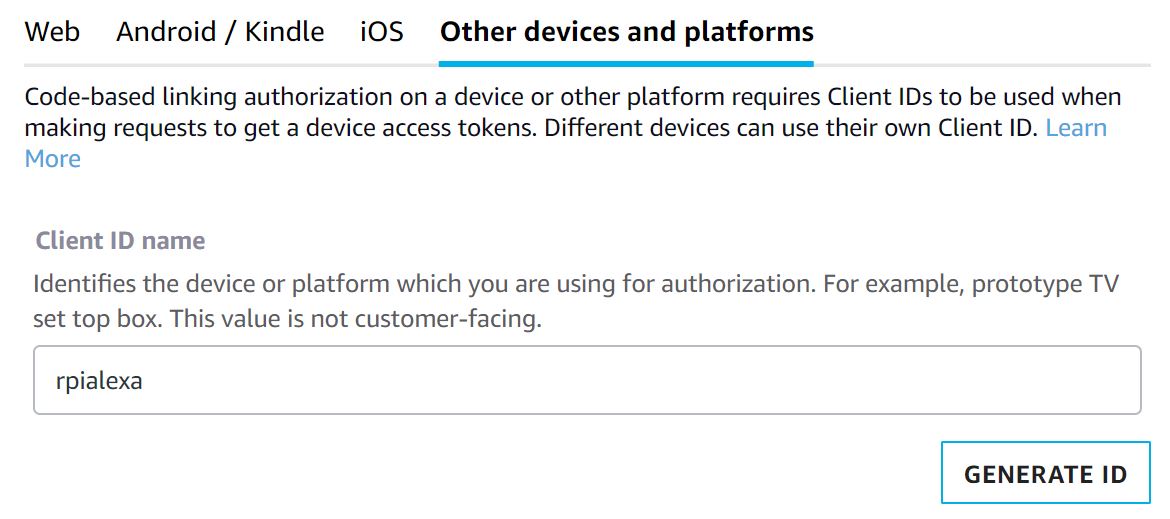
3-5. Click on “DOWNLOAD”.

3-6. Copy downloaded “config.json” file to Raspberry Pi’s home directory. If you are using Linux PC, you can do it like below.

scp ~/Downloads/config.json pi@$RPI_IP_ADDRESS:~

3-7. Review the agreement and check on it, then click on “FINISH”.

3-8. Your will be prompted “Your product has been created”. Click on “OK”.

3-9. Open a web browser and access to Login with Amazon Console.

3-10. Select the security profile just created and click on “Confirm”.

3-11. Enter a privacy policy URL and click on “Save”. In this example, let’s use a fake URL below.

http://example.com


4. SDK Installation and Configuration on RPi
4-1. Make sure you are in home directory (or wherever you copied “config.json” to in step 3-6).

4-2. Download scripts.

wget https://raw.githubusercontent.com/alexa/avs-device-sdk/master/tools/Install/setup.sh
wget https://raw.githubusercontent.com/alexa/avs-device-sdk/master/tools/Install/genConfig.sh
wget https://raw.githubusercontent.com/alexa/avs-device-sdk/master/tools/Install/pi.sh

4-3. Run setup.sh with config.json.

sudo bash setup.sh config.json

4-4. Type “AGREE” when asked for licensing agreement.

4-5. Once setup is completed, run startsample.sh.

sudo bash startsample.sh

4-6. The script will show the line like below, then access the URL with a web browser, enter the code and click on “Continue”.

To authorize, browse to: 'https://amazon.com/us/code' and enter the code: {AXRRLC}
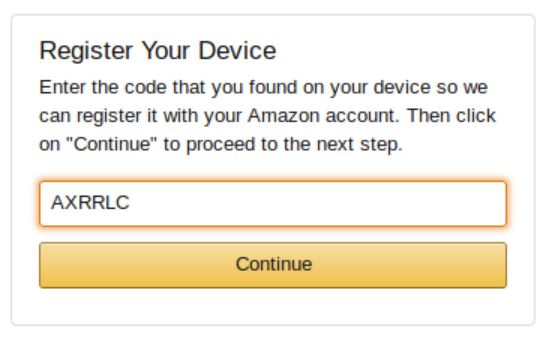
4-7. Select “Allow”. Then you’ll be prompted as below.

Also, you will be able to see the lines below in the terminal window. Now, Alexa is ready.

########################################
#       Alexa is currently idle!       #
########################################


5. Test
You can ask Alexa like

Alexa, what time is it?


References
[1] AVS Tutorials Prototype with Raspberry Pi – amazon alexa
[2] Raspberry Pi Quick Start Guide with Script – alexa/avs-device-sdk – GitHub



Controlling LEDs on Raspberry Pi using Voice with Amazon Echo

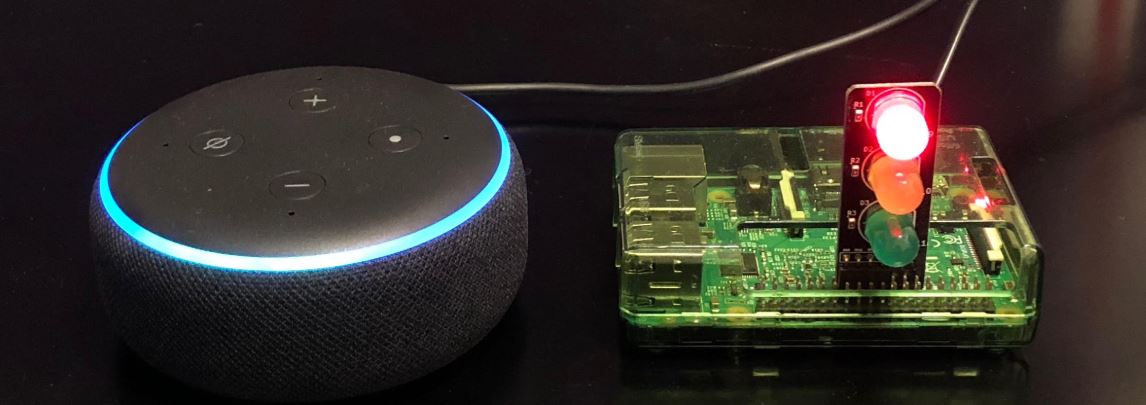
The goal of this post is to create an Alexa skill [1] that controls three LEDs (red, yellow, and green) connected to Raspberry Pi’s GPIO pins. The skill will enable to turn ON/OFF each LED by specifying the color of light and the ON/OFF status via voice command.


Prerequisites (parentheses indicate my environment)


Steps
1. Setup LEDs on Raspberry Pi
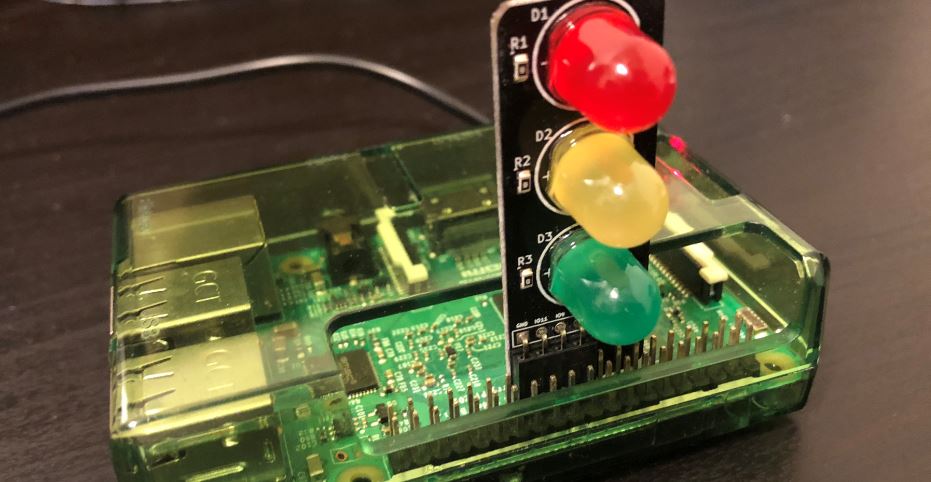
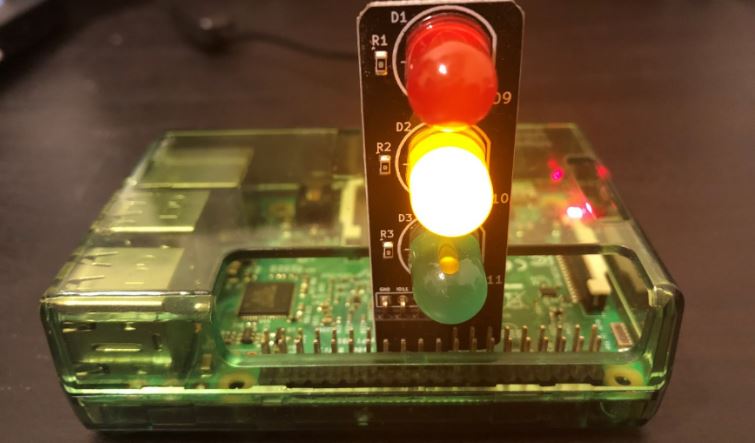
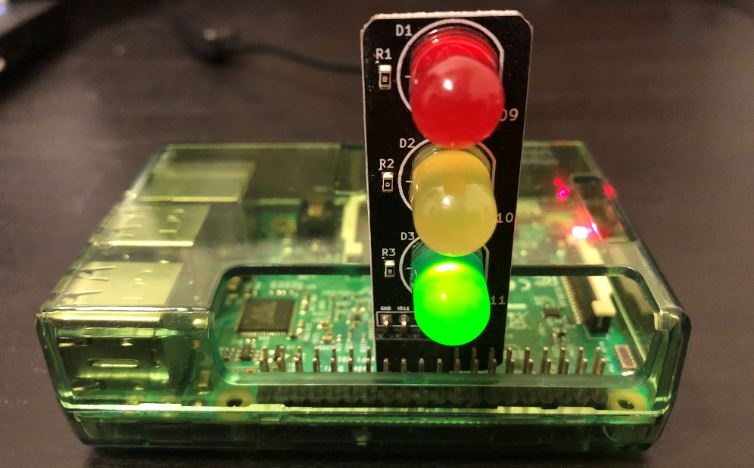
Connect LEDs to Raspberry Pi’s GPIO pins. In this post, I’ll use Pi Traffic Light. Please refer this post for setup.


2. Create Alexa skill on Raspberry Pi
flask-ask is a Flask extension that makes it easier to build Alexa skill [2].

2-1. Install Flask and flask-ask.

sudo pip install Flask flask-ask

2-2. Create a python file.

2-3. Create a python file and implement a skill like below.

from flask import Flask
from flask_ask import Ask, statement
import RPi.GPIO as GPIO

app = Flask(__name__)
ask = Ask(app, '/')

@ask.intent('LedIntent')
def led(color, status):
  if color.lower() not in pins.keys():
    return statement("I don't have {} light".format(color)) 
  GPIO.output(pins[color], GPIO.HIGH if status == 'on' else GPIO.LOW)
  return statement('Turning the {} light {}'.format(color, status))

if __name__ == '__main__':
  try:
    GPIO.setmode(GPIO.BCM)
    pins = {'red':9, 'yellow':10, 'green':11}
    for pin in pins.values(): 
      GPIO.setup(pin, GPIO.OUT)
    app.run(debug=True)
  finally:
    GPIO.cleanup()

2-4. Save the file and run the code. In this example, the file name is “led.py”.

python led.py

Now the skill is running as a local web service on default port (i.e. localhost:5000).


3. Publish Skill on the Internet
To communicate with Alexa, the skill needs to be accessible from the internet. In this post, I’ll use a tunnel service called serveo [3].

3-1. Open another terminal.

3-2. Enter the command below. It will connect the local server to a public URL.

ssh -R 80:localhost:5000 serveo.net

In the output, you should be able to find a line like below. This URL will be required as an endpoint when configuring the skill in next step.

Forwarding HTTP traffic from https://xxxxx.serveo.net


4. Configure Skill on Amazon Cloud 

4-1. Open a browser and log in to Amazon Developer. Please sign up if you don’t already have the account.

4-2. Navigate to Alexa Developer Console and click on “Create Skill”.

4-3. Enter a skill name. In this example, it’s “raspberry pi”.

4-4. Make sure “Custom” is selected then click on “Create skill”.

4-5. Make sure “Start from scratch” is selected then click on “Choose”.

4-6. Click on “+” icon next to “Slot types” in the left pane.

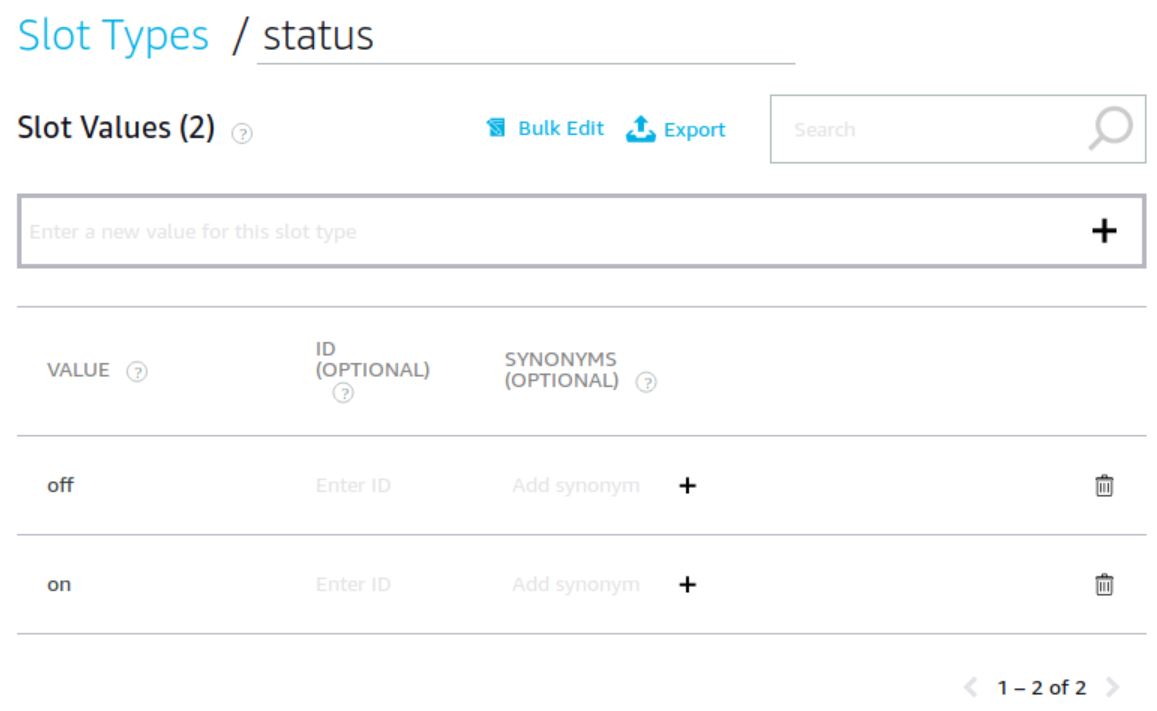
4-7. Enter “STATUS” and click on “Create custom slot type” button.

4-8. Add “on” and “off” as the slot values.

4-9. Click on “+” icon next to “Slot types” in the left pane again.

4-10. Click on “Use an existing slot type from Alexa’s built-in library”

4-11. Search “AMAZON.Color” and click on “Add slot type”.

4-12. Click on “+” icon next to “Intents” in the left pane again.

4-13. Enter “LedIntent” as an intent name, then click on “Create custom intent”.

4-14. Enter below as a Sample Utterances, then click on “+” button.

turn the {color} light {status}

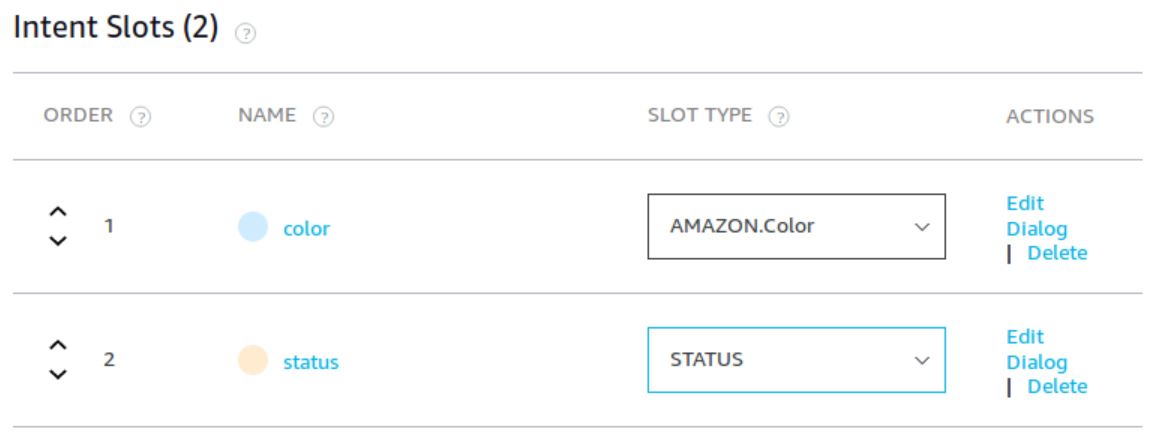
4-15. Select “AMAZON.Color” and “STATUS” types for color and status slots respectively.

4-16. Click on “Build Model” button on the top. If everything goes right, you’ll get a “Build Successful” notification.

4-17. Select Endpoint in the left pane and and check on “HTTPS”.

4-18. Enter the URL generated by serveo in Step 3.2 under Default Region.

4-19. Select “My development endpoint is sub-domain of domain that has a wildcard certificate from a certificate authority” for SSL certificate type.

4-20. Click on “Save Endpoints”


5. Testing Skill in Alexa Developer Console

5-1. Select “Test” tab in the top menu bar.

5-2. Select “Development” in the pull down menu to enable Skill testing.

5-3. Say or input below to Alexa Simulator.

ask raspberry pi to turn the red light on

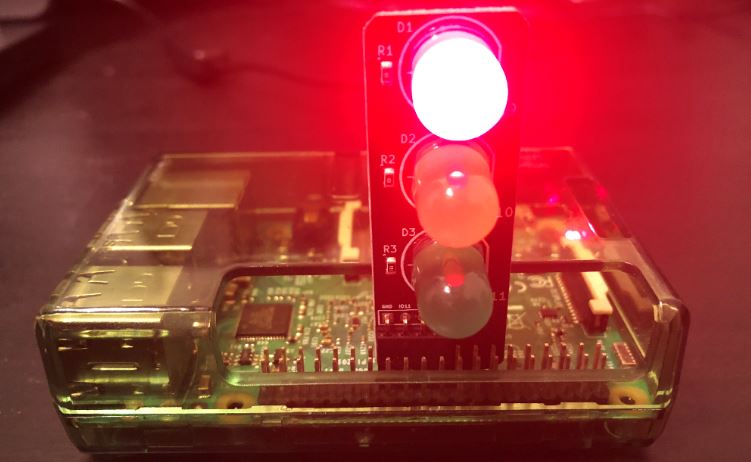
This should turn on LED light connected to you Raspberry Pi. Also, you should be able to see similar to below in Alexa Simulator.


6. Testing Skill with Amazon Echo
You can test the skill on your Alexa-enable device (e.g Echo dot) like this.

Alexa, ask raspberry pi to turn the red light on


References
[1] Alexa Skills Kit – Amazon Alexa
[2] Welcome to Flask-Ask
[3] serveo – Expose local servers to the internet
[4] Amazon Alexa + Raspberry PI + jasm.eu: Our first steps together
[5] Flask-Ask: A New Python Framework for Rapid Alexa Skills Kit Development


Updating ALSA on Raspbian Stretch

This post shows how to update ALSA [1] on Raspberry Pi running Raspbian Stretch. As of writing this post (Dec. 9th 2018) the latest ALSA version is 1.1.7.


Setup (parentheses indicate my environment)

  • Raspberry Pi (Raspberry Pi 3 B+) running Raspbian Stretch (Nov. 2018)
  • Speaker connected to Raspberry Pi’s 3.5 mm audio jack


Steps
1. Checking Preinstalled ALSA Version
1-1. First, let’s check the current ALSA version.

aplay --version

The result should be like below. In this example (Raspbian Stretch 2018 Nov. version), the preinstalled ALSA version is 1.1.3.

$ aplay --version aplay: version 
1.1.3 by Jaroslav Kysela <perex@perex.cz>

2. alsa-lib Installation [2]
2-1. Download alsa-lib.

wget ftp://ftp.alsa-project.org/pub/lib/alsa-lib-1.1.7.tar.bz2

2-2. Extract the directory.

tar xvjf alsa-lib-1.1.7.tar.bz2

2-3. Move to the extracted directory.

cd alsa-lib-1.1.7

2-4. Configure.

./configure

2-5. Build and install.

make && sudo make install


3. Curses Library Installation
ALSA requires a curses library.

3-1. Update the package list.

sudo apt-get update

3-2. Install “libncursesw5-dev”.

sudo apt-get install libncursesw5-dev -y


4. alsa-utils Installation [3]
4-1. Download alsa-utils.

wget ftp://ftp.alsa-project.org/pub/utils/alsa-utils-1.1.7.tar.bz2

4-2. Extract the directory.

tar xvjf alsa-utils-1.1.7.tar.bz2

4-3. Move to the extracted directory.

cd alsa-utils-1.1.7

4-4. Configure.

./configure --disable-alsaconf --disable-bat --disable-xmlto --with-curses=ncursesw

4-5. Build and install.

make && sudo make install


5. Verification
5-1. Check ALSA version.

aplay --version

The result should be like below. In this example, ALSA was updated from 1.1.3 (see step 1-1) to 1.1.7.

$ aplay --version
aplay: version 1.1.7 by Jaroslav Kysela <perex@perex.cz>

5-2. Make sure ALSA is working by using speaker-test [4]. If everything is fine, you should be able to hear the wav sound from the connected speaker.

speaker-test -t wav

5-3. Press ctrl-c to stop the speaker-test.


References
[1] Advanced Linux Sound Architecture (ALSA) project homepage
[2] alsa-lib-1.1.7 – Linux From Scratch!
[3] alsa-utils-1.1.7 – Linux From Scratch!
[4] Using ALSA’s speaker-test utility


Controlling LEDs with Raspberry Pi GPIO Pins


Controlling LED on Raspberry Pi is pretty easy. This post shows how to turn ON/OFF LEDs using Raspberry Pi’s GPIO pins with Python.


Setup (parentheses indicate my environment)


Steps
1. Wiring and Booting Up
In this post we’ll use Pi Traffic Light so that we can skip making the circuit. Pi Traffic Light is designed for Raspberry Pi and you can just connect it to Raspberry Pi’s GPIO pins. [1]

1-1. Follow the instruction and connect Pi Traffic Light. For Raspberry Pi’s GPIO pin numbers, this site is convenient.

1-2. Make sure a micro SD card with Raspbian OS image is inserted. In case you haven’t prepared OS image yet, please refer the steps.

1-3. Connect Micro USB Power Cable and boot Raspberry up.


2. Setting up GPIO Pins
2-1. Open Raspberry Pi’s terminal and launch Python interactive shell.

python

2-2. Import RPi.GPIO [2] to control GPIO pins.

import RPi.GPIO as GPIO

2-3. Set BCM as GPIO numbering mode since the instruction uses BCM numbering. See [3] for more about the pin numbering.

GPIO.setmode(GPIO.BCM)

2-4. For readability purpose, let’s assign the pin numbers to variables. GPIO pins 9, 10, and 11 will be used for red, yellow, and green lights respectively.

red = 9
yellow = 10
green = 11

2-5. Set those pins as output pins.

for pin in [red, yellow, green]:
    GPIO.setup(pin, GPIO.OUT)


3. Controlling LEDs
Now, the preparation is done. Let’s turn ON/OFF the LEDs by using “GPIO.output”. The first argument is for LED color (i.e. pin number) and the second argument is for OFF/ON (0 and 1 respectively).

3-1. Turn on the red light.

GPIO.output(red, 1)


3-2. Turn off the red light.

GPIO.output(red, 0)


3-3. Turn on the yellow light.

GPIO.output(yellow, 1)


3-4. Turn off the yellow light.

GPIO.output(yellow, 0)


3-5. Turn on the green light.

GPIO.output(green, 1)


3-6. Turn off the green light.

GPIO.output(green, 0)


4. Finishing the Program
4-1. Reset the all the pins to input mode. [4]

>>> GPIO.cleanup()

4-2. Ctrl-D to quit the Python.


References
[1] Pi Traffic Light – LOW VOLTAGE LABS
[2] RPi.GPIO – PyPI
[3] What is the difference between BOARD and BCM for GPIO pin numbering?
[4] How to Exit GPIO programs cleanly, avoid warnings and protect your Pi


Enabling Background BLE Scanning on iPhone


A previous post shows how to create a simple BLE (Bluetooth Low Energy) scanner app for iPhone. The app can detect BLE devices while the app is in foreground. The goal of this post is to create an app that scans even it goes to the background.


Prerequisites (parentheses indicate my environment)

  • Xcode (10.0) ruining on Mac (10.14)
  • iPhone (iPhone 8 with iOS 12.0.1)
    * An actual iOS device is required since Bluetooth is not supported in Xcode simulator.
  • A BLE peripheral device to be scanned (Galaxy S7 running BLE Peripheral Simulator app [1])


Steps
1. Launch Xcode and create a Single View App.

2. Select Info.plist in Project navigator.

3. Click on “+” button next to “Information Property List” and select “Required Background Modes”.

4. Expand “Required Background Modes” by clicking on the triangle icon.

5. Add “App communicates using CoreBluetooth” as the value.

6. Open ViewController.swift file and import CoreBluetooth framework.

import CoreBluetooth

7. Add CBCentralManagerDelegate protocol to ViewController class.

class ViewController: UIViewController, CBCentralManagerDelegate {

8. Then, Xcode will prompt an error. Click on “Fix” button and it will create  centralManagerDidUpdateState() method which will be called when the central manager’s state is changed. At startup, this method is called after instantiating CBCentralManager.

9. Declare a variable for CBCentralManager in ViewController class.

private var centralManager : CBCentralManager!

10. Instantiate CBCentralManager in viewDidLoad().

centralManager = CBCentralManager(delegate: self, queue: nil, options: nil)

11. In centralManagerDidUpdateState() method, start scanning when the state is poweredOn.

if central.state == .poweredOn {
    print("Bluetooth is On")
    centralManager.scanForPeripherals(withServices: [CBUUID(string: "0000180F-0000-1000-8000-00805F9B34FB")], options: nil)
} else {
    print("Bluetooth is not active")
}

In order to scan in background, service UUIDs need to be specified [2]. In this post, the app will scan for Battery Service [3] for testing purpose (Line 3).

8. Define centralManager didDiscover method. It will be called when any advertising device is discovered. Inside the method, it prints the device name, RSSI, and advertising data.

public func centralManager(_ central: CBCentralManager, didDiscover peripheral: CBPeripheral, advertisementData: [String : Any], rssi RSSI: NSNumber) {
    print("\nName   : \(peripheral.name ?? "(No name)")")
    print("RSSI   : \(RSSI)")
    for ad in advertisementData {
        print("AD Data: \(ad)")
    }
}

9. Open AppDelegate.swift file and add print statements in applicationDidEnterBackground method and applicationWillEnterForeground method to output the app state transitions.

func applicationDidEnterBackground(_ application: UIApplication) {
    print("entered background.")
}
    
func applicationWillEnterForeground(_ application: UIApplication) {
    print("entering foreground.")
}


Test
1. Background Scan
1-1. Make sure below conditions before start.

  • The peripheral device is not advertising yet.
  • Bluetooth is ON on the iPhone.

1-2. Connect iPhone to Mac.

1-3. Build and run the program.

1-4. Lock the iPhone screen by pressing the side button.

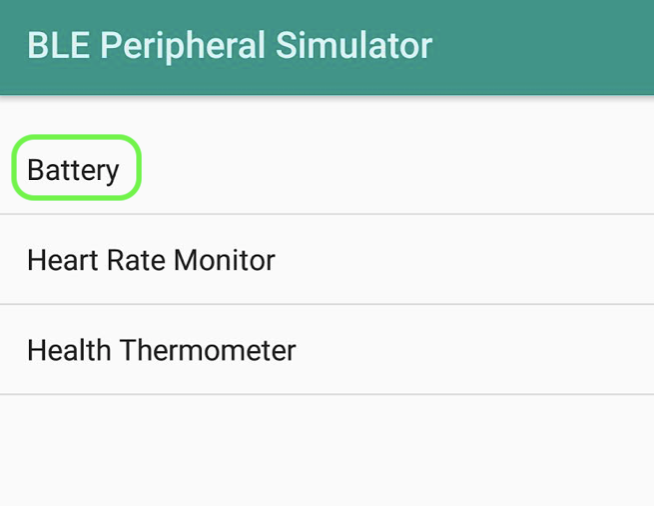
1-5. Start advertising on the peripheral device. In case of BLE Peripheral Simulator, launch the app and tap on “Battery”.

Below is the example of the result of background scan.

Bluetooth is On
entered background.

Name   : (No name)
RSSI   : -59
AD Data: (key: "kCBAdvDataTxPowerLevel", value: -7)
AD Data: (key: "kCBAdvDataIsConnectable", value: 1)
AD Data: (key: "kCBAdvDataServiceUUIDs", value: <__NSArrayM 0x2807f01b0>(Battery))

Notice that the Bluetooth device name is not detected. Let’s scan in foreground and compare the results.


2. Foreground Scan
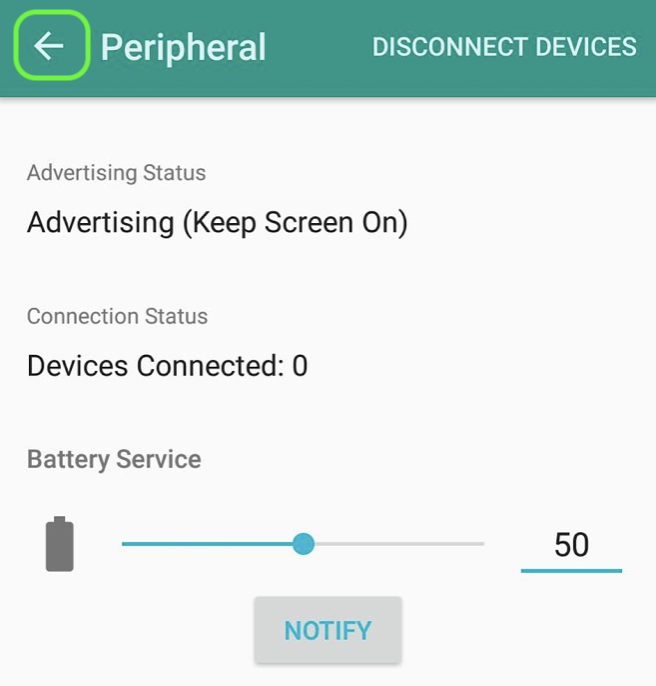
2-1. Stop advertising on the peripheral device by tapping Back button.

2-2. Cancel screen lock on iPhone.

2-3. Restart advertising on the peripheral device.

entering foreground.

Name   : (No name)
RSSI   : -69
AD Data: (key: "kCBAdvDataTxPowerLevel", value: -7)
AD Data: (key: "kCBAdvDataIsConnectable", value: 1)
AD Data: (key: "kCBAdvDataServiceUUIDs", value: <__NSArrayM 0x281e09770>(Battery))

Name   : Galaxy S7
RSSI   : -69
AD Data: (key: "kCBAdvDataLocalName", value: Galaxy S7)
AD Data: (key: "kCBAdvDataServiceUUIDs", value: <__NSArrayM 0x281e09950>(Battery))
AD Data: (key: "kCBAdvDataTxPowerLevel", value: -7)
AD Data: (key: "kCBAdvDataIsConnectable", value: 1)

In above, didDiscover peripheral callback was called twice (Line 3-7 and Line 9-14). AD Data of the first result is same as the background scan result. The second result additionally has a device name in AD Data (Line 11).
According to an Apple Developer Forum post [4], the first result is from the initial Advertising packet and the second is from Scan Response packet. And the second packet is not guaranteed when the iOS app is running in background. That explains why the background scan result didn’t have the second packet.
So, when scanning in background, some data may not be available (e.g. in this case, the device name).


Takeaway
BLE scan while app is in background (even when screen is locked) is possible. However, there are some limitations need to be consider when writing an app.

  • Service UUIDs need to be specified when starting BLE scan.
  • Some data may not be received. (i.e. Data in Scan Response)
  • Other limitations are describe in Apple’s official document [5].


References
[1] BLE Peripheral Simulator – Google Play Store
[2] scanForPeripherals(with Services: options:) – Apple Developer
[3] GATT Specifications Battery Service – Bluetooth SIG
[4] Apple Developer Forums – Apple Developer
[5] Core Bluetooth Background Execution Modes – Apple Developer