This post shows a way to generate a UML class diagram from C++ header file(s) using PlantUML [1] and hpp2plantuml [2].
Assumptions
- Debian-based linux distribution (I used Ubuntu 20.04)
Steps
1. Install hpp2plantuml
hpp2plantuml is used to convert C++ header file to PlantUML.
1-1. Install pip if not already installed.
sudo apt install python3-pip -y
1-2. Install hpp2plantuml with pip.
pip install hpp2plantuml
2. Install plantuml
plantuml command is used to generate a image from a PlantUML file.
2-1. Install plantuml with apt.
sudo apt install plantuml -y
3. Test
In this post, I use a sample c++ header file from hpp2plantuml repo to demonstrate.
3-1. Download a sample header file.
wget https://github.com/thibaultmarin/hpp2plantuml/blob/v0.8.2/tests/simple_classes_1_2.hpp
3-2. Convert the sample C++ header file to a PlantUML file.
hpp2plantuml -i simple_classes_1_2.hpp -o output.puml
3-3. Generate a class diagram image from the PlantUML file.
plantuml -tsvg output.puml
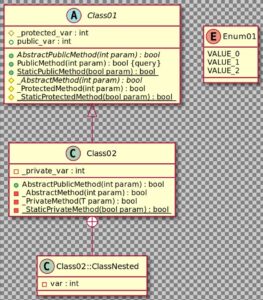
You can change the image format with the output file format option.
References
[1] PlantUML
[2] hpp2plantuml – GitHub