
This post shows how to setup serial communication between Raspberry Pi and PC using a USB-Serial cable.
Here is the list of contents of this post.
Prerequisites
These are required things for this post.
- Raspberry Pi board : Any Raspberry Pi should work. In this post, Raspberry Pi 3 B+ running Raspbian Stretch is used.
- PC : The other endpoint. In this post, a Windows 10 PC is used.
- USB-serial cable : USB to Serial UART converter cable such as this. Make sure the signal voltage level is correct.
- 3 jumper wires (male-female) : to connect Raspberry Pi’s GPIO pins and USB-Serial cable.
Also, terminal emulator programs are used both on Raspberry Pi and PC to send/receive data.
Steps
1. Wiring
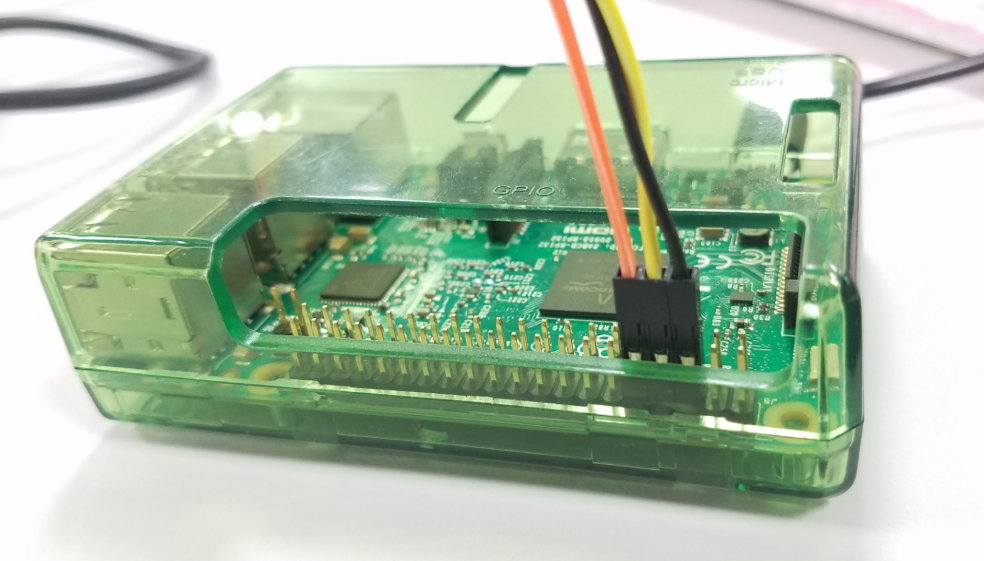
1-1. Connect jumper wires to USB-Serial cable for Tx, Rx, and GND.
1-2. Connect the other side of jumper wires to Raspberry Pi’s GPIO pins. Check this useful site for pinout.
1-3. Connect USB-Serial cable to USB port on PC
2. Setting up terminal emulator on Windows PC
To send and receive serial data, let’s install and setup a terminal emulator program on PC.
2-1. Download and install Termite.
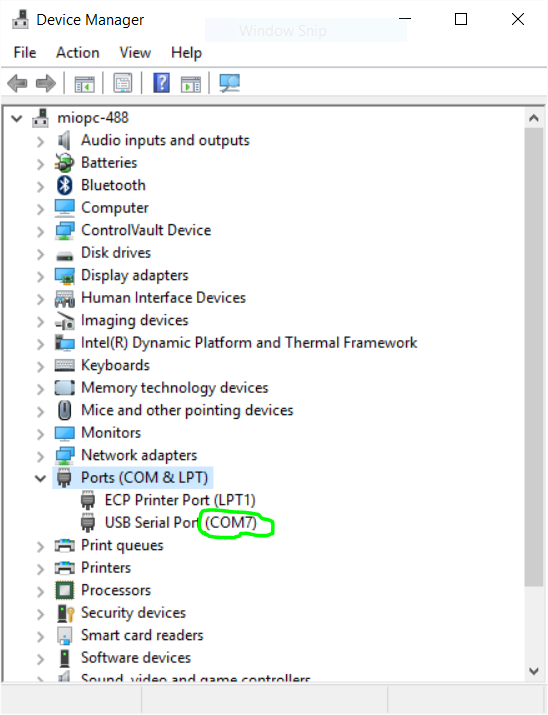
2-2. Open “Device Manager” and check the COM port number USB-Serial cable is using. In the case below, it’s COM7.
2-3. Launch Termite and click on “Settings” button.
2-4. Select Port number you checked on step 2-2.
2-5. Select “115200” as Baud rate.
2-6. Select “Append CR-LF” in “Transmitted Text”.
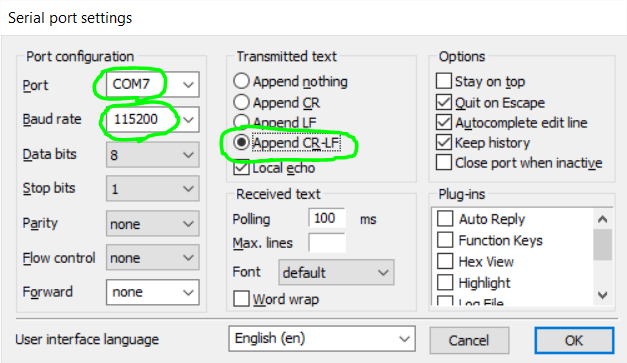
2-6. Click on “OK”.
3. Enabling UART on Raspberry Pi
3-1. Open “/boot/config.txt”.
sudo nano /boot/config.txt
3-2. Add the lines below at the end of the file.
# Enable UART
enable_uart=1
3-3. Reboot.
sudo reboot
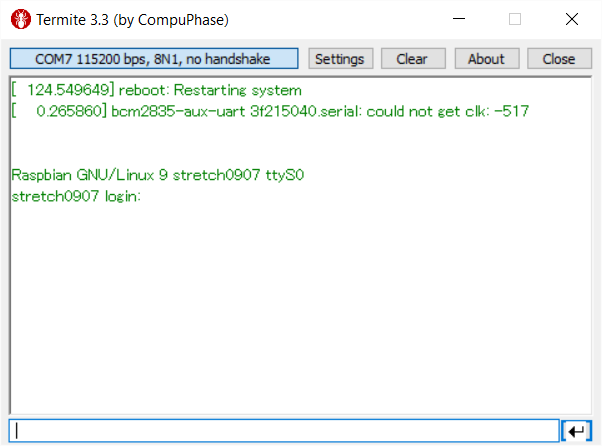
3-4. Check the output of Termite on PC. It should be something like this:
4. Disabling console service
Now, UART connection between Raspberry Pi and PC is established. However, Raspberry Pi’s UART is used by console by default as you saw in the output on step 3-4. So, the next step is to disable the console.
4-1. Disable serial-getty service.
sudo systemctl disable serial-getty@ttyS0.service
sudo nano /boot/cmdline.txt
4-3. Remove “console=serial0,115200”, then save the file.
sudo reboot
5. Setting up terminal emulator on Raspberry Pi
To send and receive data on Raspberry Pi, we’ll use minicom, a text-based terminal emulator.
5-1. Install minicom.
sudo apt-get install minicom -y
5-2. Type below to launch minicom and connect to UART.
minicom -b 115200 -o -D /dev/ttyS0
You should see like below:
Welcome to minicom 2.7

OPTIONS: I18n
Compiled on Apr 22 2017, 09:14:19.
Port /dev/ttyS0, 21:13:28

Press CTRL-A Z for help on special keys
6. Test
Type something in minicom and Termite. If everything is fine, you should see like below.
– Termite on Windows PC

– minicom on Raspberry Pi
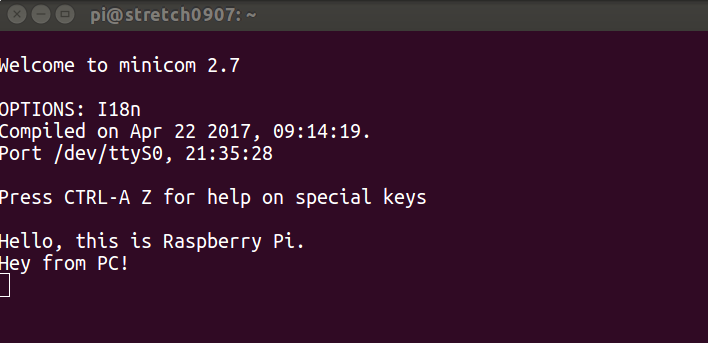
- If you want to see what you typed on minicom, turn on Local Echo by typing Ctrl-A, then E. (which I did)
- You can exit minicom by typing Ctrl-A, and X, then select “Yes”.
Hello. Thank you for this great information. I have been trying to figure this out for somedays. Thanks to your help it was easily. Although I have a question whether this communication can be achieved between two Raspberry Pi’s? If yes then how to establish the connection between them first? Please reply asap.
Hi Amit, thank you for your comment.
Yes, it is possible. Instead of using USB-Serial cable, you can connect two raspberry pis directly using the three jumper wires. Please note that the Rx pin on one Raspberry Pi should be connected to the Tx pin on the other Raspberry Pi, and vise versa.
Please check this post for detail steps.
I can receive data from computer but but unable to transfer.
Hi Abdul, please make sure the wiring of Tx line is correct. Also, make sure the flow control is disabled on both side.
Thanks. I want to know how to increase polling time I need to read data about 72000 samples so polling time is just 100ms i wana increase the polling time please help me thanks
Thanks. Can you please tell me how to increase polling time. I have to process data for long time but it allows just for 100ms
I got it.. thanks 🙏
im using an old pi that instead of uses /dev/ttyS0 it uses /dev/ttyAMA0 this is fin I’ve done a few things different but everything works except that the pi doesn’t display any text i would love a way of debugging it to see if the data actually gets to the pin but i don’t an oscilloscope so i cant give you that information unless you can think of another way of seeing signal.
I’m also not sure what flow control is that you mentioned above thanks