
Heroku’s free plan is great for experimenting/prototyping cloud applications. This post shows the steps to deploy existing Django project to Heroku cloud platform using Windows host. As an example, I’ll use this django app from GitHub and deploy it to Heroku.
Here is the list of contents of this post.
Contents
– Steps
1. Setup Python Environment on Windows
2. Install Heroku CLI and Git
3. Setup Local Environment (App & Django)
4. Verify Local Environment
5. Setup Heroku
6. Deploy your application to Heroku
7. Verify
– Summary
– Reference
Steps
Note: If you already have working Python/Django environment with pipenv on your Windows PC, skip Step 1, 3 and 4.
1. Setup Python Environment on Windows
1-1. Download Python installer from here. In this post, I use Windows x86-64 executable installer for Python 3.6.4 which is the latest at the moment.
1-2. Launch the installer.
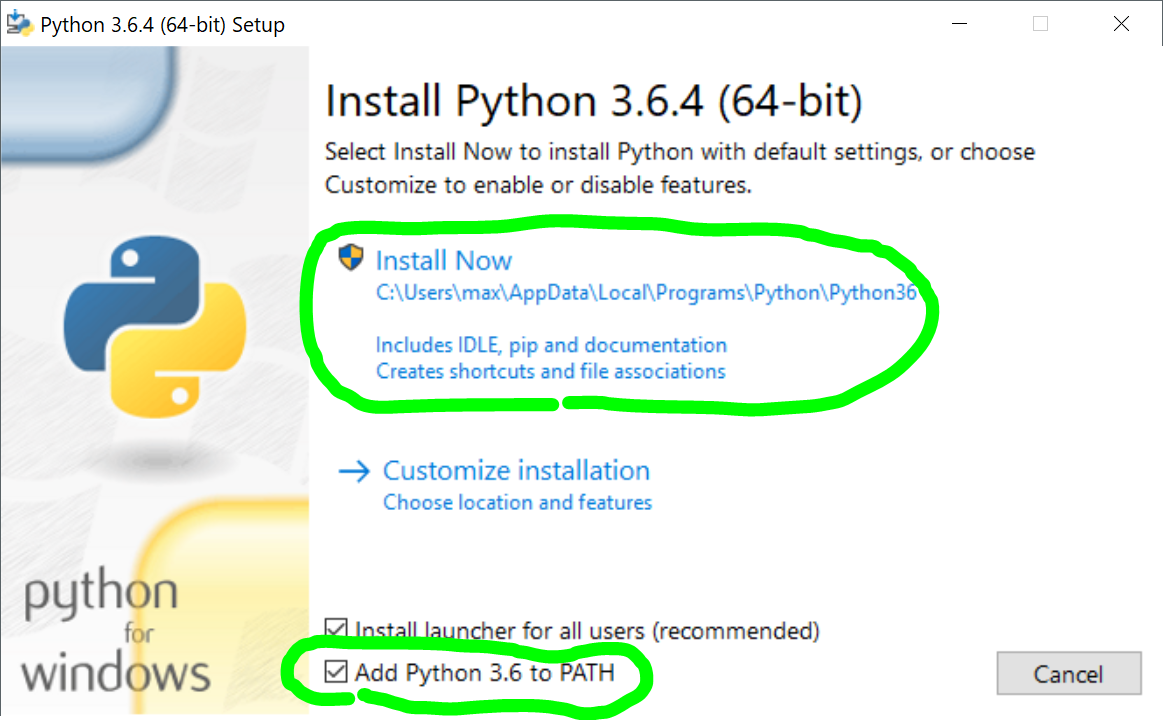
1-3. Check on “Add Python 3.6 to PATH” option, then click on “Install Now”.
1-4. After Python is successfully installed, open “Command Prompt” (Press Win + x, then select “Command Prompt”.)
1-5. Install pipenv by running the following command:
pip install pipenv
2. Install Heroku CLI and Git
Since Heroku CLI (Command Line Interface) tool installer also installs Git which will be used in the next step, let’s install both here. Heroku CLI will be required later, in Step 5.
2-1. Download the installer from here and launch it.
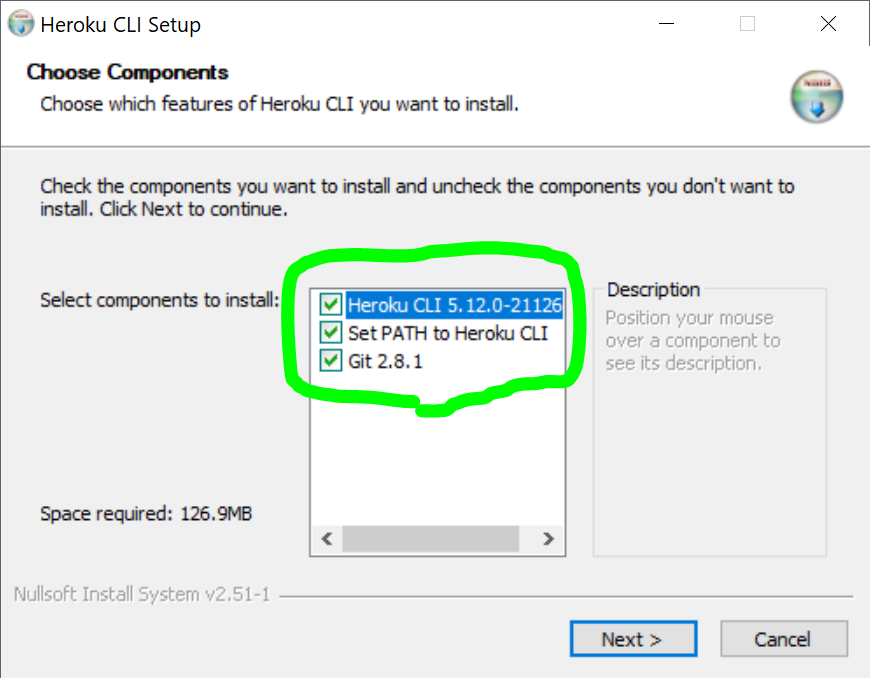
2-2. When choosing components, make sure “Set Path to Heroku CLI” and “Git” is selected.
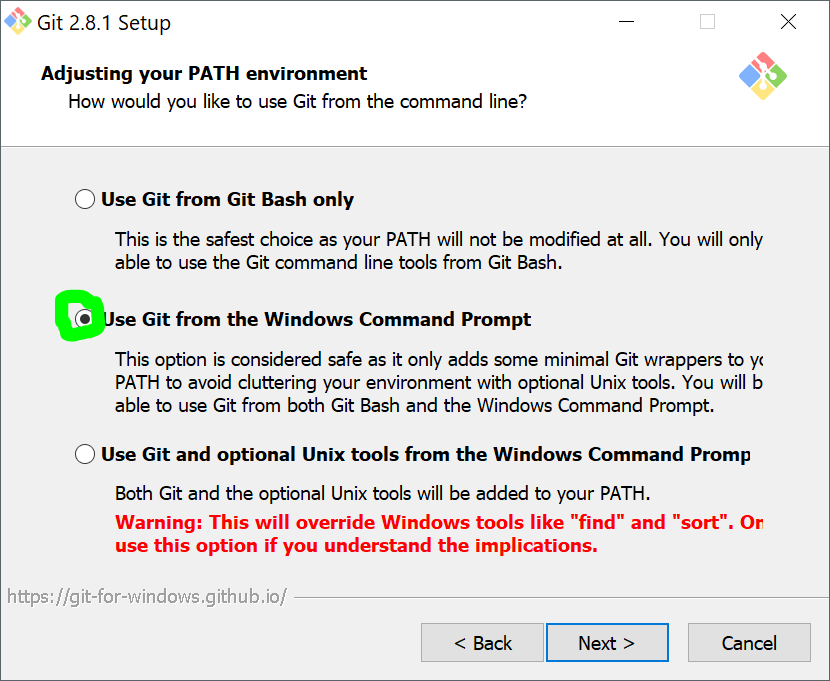
2-3. When setting up PATH environment for Git, make sure “Use Git from the Windows Command Prompt” is selected.
3. Setup Local Environment (App & Django)
Note: In this post, I use this simple-django-login as an example of existing Django app.
3-1. Re-launch “Command Prompt” to load the updated PATH environment variable for Git (and heroku CLI).
3-2. Clone an existing Django app.
git clone https://github.com/sibtc/simple-django-login.git && cd simple-django-login
3-3. Create a python virtual environment with pipenv.
pipenv --three
3-4. Spawns a shell within the virtualenv.
pipenv shell
3-5. Install “django”.
pipenv install django
4. Verify Local Environment
Before applying any changes for heroku, let’s verify if the app works in the local environment.
4-1. Run the app by typing the following command:
python manage.py runserver
The output should be like this:
C:\work\simple-django-login>python manage.py runserver
Performing system checks...

System check identified no issues (0 silenced).

You have 12 unapplied migration(s). Your project may not work properly until you apply the migrations for app(s): auth, contenttypes, sessions.
Run 'python manage.py migrate' to apply them.
February 09, 2018 - 12:21:56
Django version 2.0.2, using settings 'login.settings'
Starting development server at http://127.0.0.1:8000/
Quit the server with CTRL-BREAK.
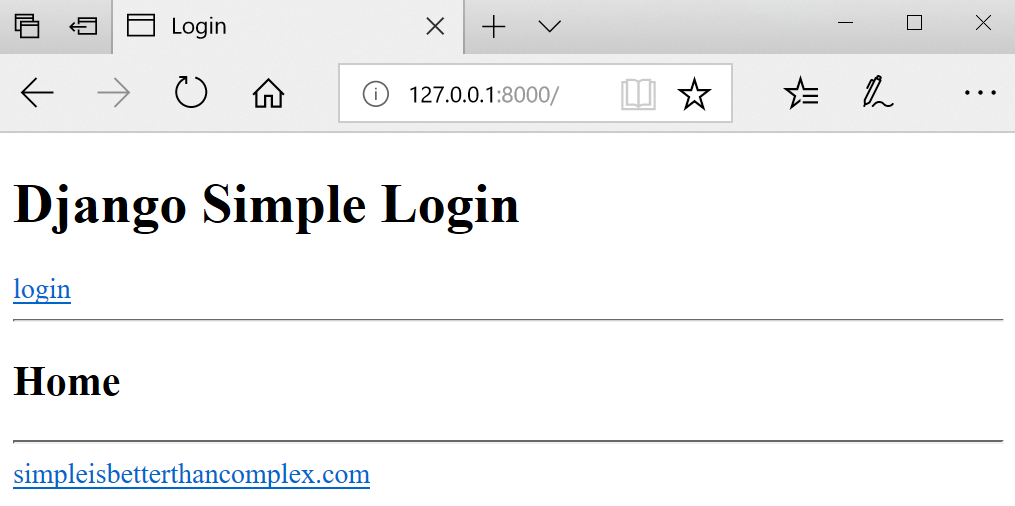
4-2. Then access “http://127.0.0.1:8000/” with a browser. If everything is fine, you should see “Django Simple Login” page.
5. Setup Heroku
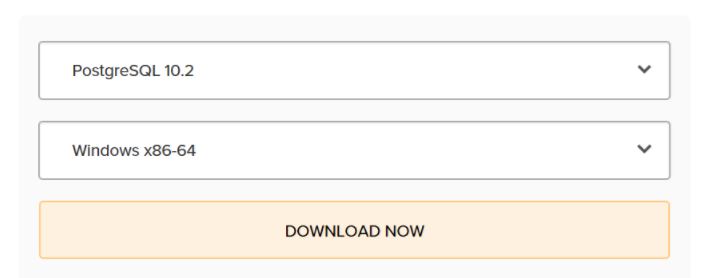
5-1. Download PostgreSQL installer from here and install it.
5-2. Install “django-heroku”. This module configures Django app for deployment on Heroku. [4]
pipenv install django-heroku
5-3. Add lines below at the bottom of “settings.py” in “login” app.
# Configure Django App for Heroku.
import django_heroku
django_heroku.settings(locals())
5-4. In “simple-django-login” folder, create a file named “Procfile.windows” with the content below.
web: python manage.py runserver localhost:8000
5-5. Verify local heroku environment by typing below:
heroku local web -f Procfile.windows
Then access “http://127.0.0.1:8000/” with browser. You should see “Django Simple Login” page same as Step 4-2. Now, the app is working with heroku local environment.
6. Deploy your application to Heroku [5]
6-1. Install gunicorn.
pipenv install gunicorn
Note: gunicorn is not required on Windows local environment but this step adds it’s package dependency to Pipfile, which will be used on heroku remote.
6-2. In “simple-django-login” folder, create a file named “Procfile” with the content below:
web: gunicorn login.wsgi --log-file -
6-3. Create a Heroku account from here if you don’t have it already.
6-4. Login heroku account by using “Heroku Command Line Interface”.
heroku login
You’ll be asked for your credentials.
C:\work\simple-django-login>heroku login
Enter your Heroku credentials:
Email: xxx@xxxxx.com
Password: ****************
Logged in as xxx@xxxxx.com
6-5. Create heroku application. It automatically creates the git remote too.
heroku create simple-django-login
The output should be like this:
C:\work\simple-django-login>heroku create simple-django-login
Creating ⬢ simple-django-login... done
https://simple-django-login.herokuapp.com/ | https://git.heroku.com/simple-django-login.git
6-6. Add files to git repo.
git add .
6-7. Commit it.
git commit -m "Initial commit"
6-8. Upload to Heroku remote.
git push heroku master
6-9. Migrate database.
heroku run python manage.py migrate
7. Verify
7-1. Open the app by typing the command below:
heroku open
The command automatically open “https://simple-django-login.herokuapp.com/”.
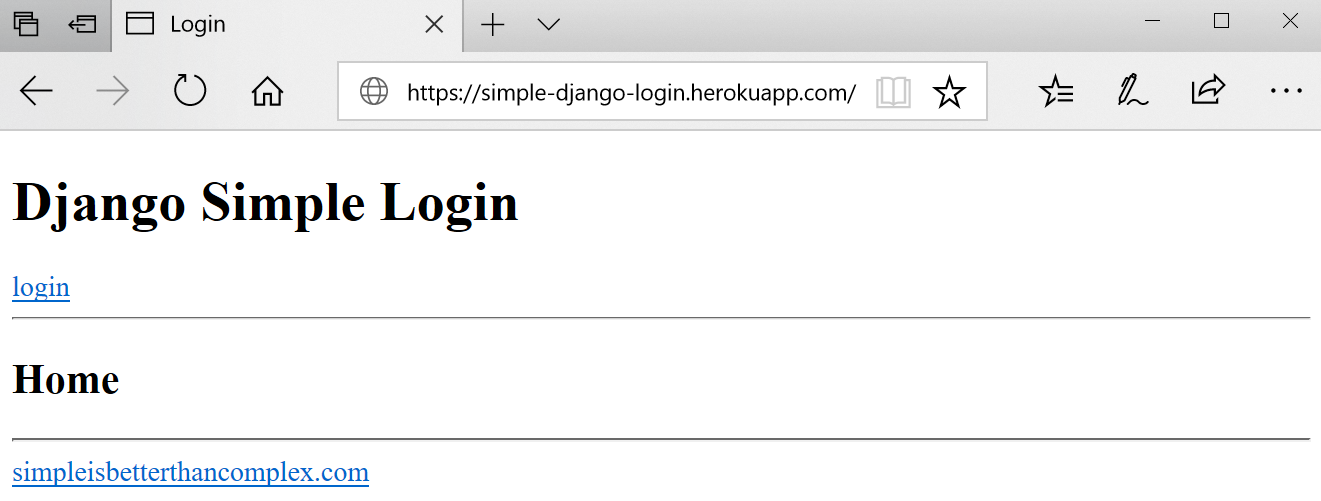
Now, your django app is up and running on Heroku cloud and you can access from anywhere.
References
[1] Migrating an existing Django project
[2] Heroku Django Starter Template
[3] How to Deploy Django Applications on Heroku
[4] Django-Heroku (Python Library)
[5] Deploy your application to Heroku