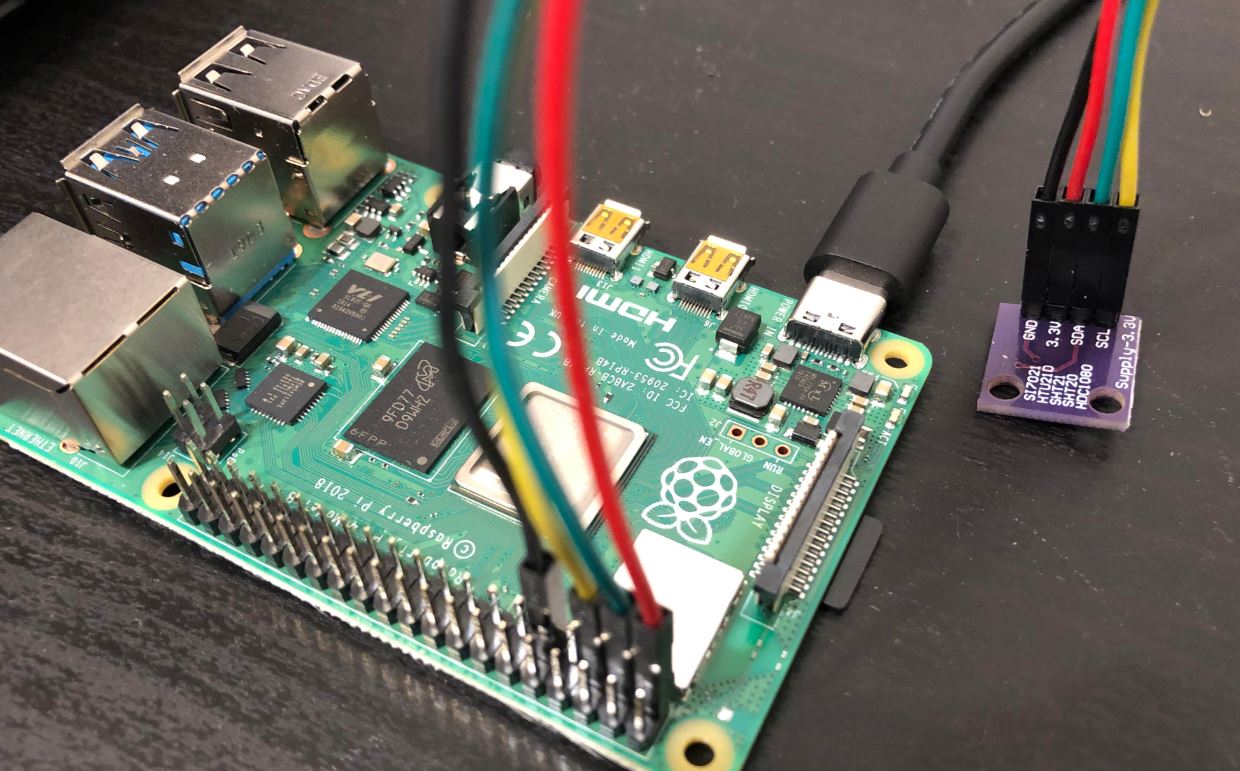
This post shows steps to setup I2C serial communication [1] on Raspberry Pi with an I2C peripheral device. I’ll use a temperature and humidity sensor as an example of I2C peripheral. The goal is to read those sensors value on Raspberry Pi.
I assume that you already installed Raspbian OS on your Pi, if not, please setup Raspbian OS first.
- Raspberry Pi (Raspberry Pi4 B running Raspbian Buster 2019-06-20)
- Temperature & Humidity Sensor (any HTU21D sensor [2] such as this should work)
- Jumper wires
Steps
1. Enabling I2C
1-1. I2C is disabled by default on Raspbian. To enable I2C, run raspi-config.
sudo raspi-config
1-2. Select “Interfacing Options”, then “I2C”.
1-3. Select “Yes” when it asks you to enable I2C.
1-5. Select “OK” and exit raspi-config.
2. Installing i2c-tools
2-1. Install i2c-tools if it’s not already.
sudo apt-get install i2c-tools -y
2-2. Let’s check the I2C bus before connecting the sensor.
i2cdetect -y 1
The result should be like this. If any I2C device is connected, it’s going to be showing up with its I2C slave address. Since nothing is connected yet, nothing is coming up this time.
$ i2cdetect -y 1
     0  1  2  3  4  5  6  7  8  9  a  b  c  d  e  f
00:          -- -- -- -- -- -- -- -- -- -- -- -- --
10: -- -- -- -- -- -- -- -- -- -- -- -- -- -- -- --
20: -- -- -- -- -- -- -- -- -- -- -- -- -- -- -- --
30: -- -- -- -- -- -- -- -- -- -- -- -- -- -- -- --
40: -- -- -- -- -- -- -- -- -- -- -- -- -- -- -- --
50: -- -- -- -- -- -- -- -- -- -- -- -- -- -- -- --
60: -- -- -- -- -- -- -- -- -- -- -- -- -- -- -- --
70: -- -- -- -- -- -- -- --
3-1. Power off the Raspberry Pi.
3-2. Connect Raspberry Pi and the sensor with jumper wires (for Power, GND, Data, and Clock lines). You can find pins for I2C from here.
3-3. Boot up the Raspberry Pi.
3-4. Run the command again and check if the sensor is detected as an I2C peripheral.
i2cdetect -y 1
The result should be like this.
$ i2cdetect -y 1
     0  1  2  3  4  5  6  7  8  9  a  b  c  d  e  f
00:          -- -- -- -- -- -- -- -- -- -- -- -- --
10: -- -- -- -- -- -- -- -- -- -- -- -- -- -- -- --
20: -- -- -- -- -- -- -- -- -- -- -- -- -- -- -- --
30: -- -- -- -- -- -- -- -- -- -- -- -- -- -- -- --
40: 40 -- -- -- -- -- -- -- -- -- -- -- -- -- -- --
50: -- -- -- -- -- -- -- -- -- -- -- -- -- -- -- --
60: -- -- -- -- -- -- -- -- -- -- -- -- -- -- -- --
70: -- -- -- -- -- -- -- --
4. Testing
4-1. Install a library for HTU21D sensor. [3]
pip install htu21df
4-2. Launch python interactive shell.
python
4-3. Import the library and create HTU21 object.
from htu21 import HTU21
htu = HTU21()
4-4. Read the temperature value.
htu.read_temperature()
4-5. Then, read the humidity value.
htu.read_humidity()
The result should be like this:
>>> htu.read_temperature()
26.670544433593754
>>> htu.read_humidity()
44.258636474609375
*If you want to connect other device than HTU21D sensor, use smbus/smbus2 [5] or raw device [6] instead.
References
[1] I2C – Wikipedia
[2] HTU21D(F) Sensor Datasheet
[3] MSeal/htu21df_sensor – GitHub
[4] Raspberry Pi I2C Pinout
[5] smbus2 – PyPI
[6] Need help with HTU21D Humidity Sensor (for RPi outreach)

