
This post shows steps to enable webcams in a VirtualBox guest OS on Windows host. OS/software and the version I used are below. I tested it with Microsoft Surface Pro 4 and Dell Precision 3510.
Host: Windows 10 running VirtualBox 5.2.6.
Guest: Ubuntu Linux 16.04.03 / Mac OS X High Sierra
Here is the steps.
Steps
1. Install ‘Oracle VM VirtualBox Extension Pack’
VirtualBox Extension Pack is required in order to use webcams in VirtualBox guest OS. [1]
1-1. From the VirtualBox Download page, download the extension pack which has the save version as your VirtualBox. In my case, my VirtualBox is v5.2.6 so I downloaded this:
http://download.virtualbox.org/virtualbox/5.2.6/Oracle_VM_VirtualBox_Extension_Pack-5.2.6.vbox-extpack
1-2. Launch “Oracle VirtualBox Manager” and navigate to “File” -> “Preferences”.
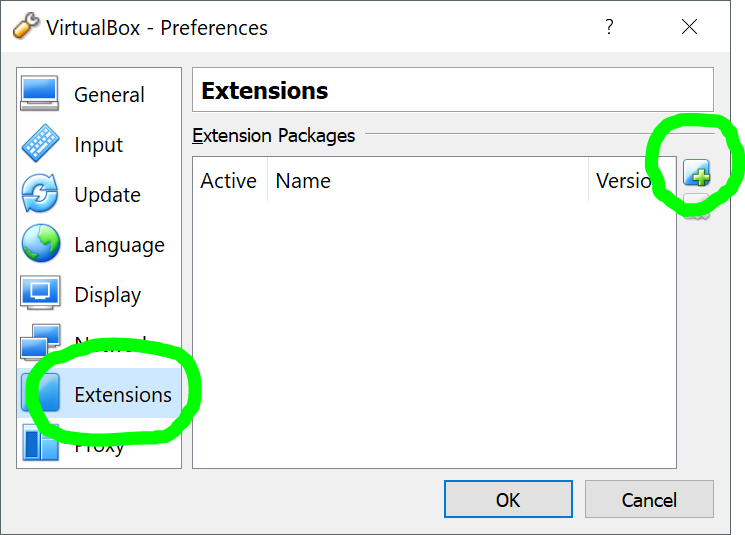
1-3. In ‘Preferences’ window, select ‘Extensions’.
1-4. Press ‘Add new package’ icon.
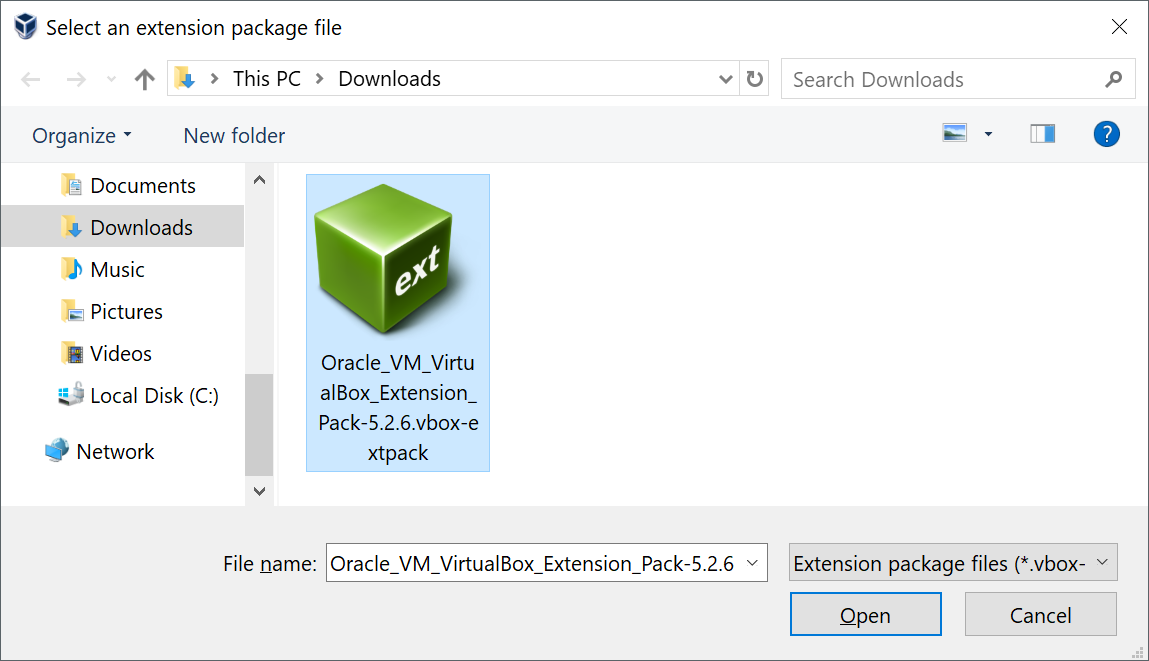
1-5. Select the extension pack and install it.
2. Attaching webcam to guest OS
2-1. Launch the guest OS.
2-2. Launch “Command Prompt” on Windows (Press the Win + R keys, then, type ‘cmd’ and enter) and go to VirtualBox folder.
cd c:\Program Files\Oracle\VirtualBox
2-3. List available cameras.
VBoxManage list webcams
The result should be like below. In case of Surface Pro 4, it has 2 cameras (front and rear).
c:\Program Files\Oracle\VirtualBox>VBoxManage list webcams
Video Input Devices: 2
.1 "Microsoft Camera Rear"
\\?\display#int3470#4&3b1d693f&0&uid13424#{65e8773d-8f56-11d0-a3b9-00a0c922319...
.2 "Microsoft Camera Front"
\\?\display#int3470#4&3b1d693f&0&uid13424#{65e8773d-8f56-11d0-a3b9-00a0c922319...
2-4. Attach webcam(s) you want to use. The number at the end of the line specifies the camera. In this example, if you want to attach the front camera, type like this:
VboxManage controlvm "Ubuntu 16.04.3" webcam attach .2
* Replace “Ubuntu 16.04.3” with your guest OS name.
* You can attach multiple cameras if you want.
3. Verify (Ubuntu Guest)
In case of Linux, cheese is handy to test webcam functionality.
3-1. Install it if it’s not already.
sudo apt-get install cheese
3-2. Then, just type ‘cheese’ to launch. You should be able to see a video stream in newly opened ‘Cheese’ window.
cheese
4. Verify (Mac OS Guest)
In Mac OS X, I used ‘Photo Booth’ application to verify.
4-1. Launch ‘Spotlight Search’ by clicking the magnifying glass icon in the upper right corner of the screen.
4-2. Type ‘Photo Booth’ and enter to launch. You should be able to see a video stream in ‘Photo Booth’ window.
References
[1] Oracle VM VirtualBox User Manual 9.7. Webcam passthrough
[2] VirtualBox Download page
[3] Install VirtualBox Extension Pack on Linux and Windows
[4] Connecting a webcam to a VirtualBox guest OS
it worked like a charm!
What do I do when the following command “VBoxManage list webcams” returns “Video Input Devices: 0”?
I am using a Dell Precision M4600. I’m also using Win10 Pro as OS on my laptop and Ubuntu 16.04 LTS in my Virtualbox. My camera works fine with the “Camera” app in Win10 however the ubuntu based VM returns an error suggesting “No Device found” when I run cheese.
Exact error from Terminal: Message: cheese-application.vala:211: Error during camera setup: No device found
This is my promblem too!
Thank you very much! I worked perfectly fine!
Thanks very much…. it works now.
This didn’t work for me, I am running the latest virtual box and I am getting Failed to attach the Webcam is busy.
Is there a way to attach the webcam with a custom name so it doesn’t show up as “virtualbox camera” in the guest os?
Hi now how to detach camera?
You’ve got this information here: https://docs.oracle.com/en/virtualization/virtualbox/6.0/admin/webcam-passthrough.html.
VBoxManage controlvm VM-name webcam detach [host_path|alias]
Works as expected, thank you ^_^
Thank you!
not working
I have successfully applied all above with adding the camera in the cmd command and so on. but still in my whatsapp on android in my virtualbox whatsapp is not able to make a video call. i got the message: whatsapp was unable to access your camera. please restart your phone.
after restarting my phone of course, the problem is still there.
Thank you very much!
I’ve been trying all sorts of thing and this one finaly worked.
Thanks! I’m using Virtual Box 6.1 and it worked!