
This post shows steps to enable Amazon Alexa on Raspberry Pi. While there is already a comprehensive tutorial on Amazon Alexa official site [1], this post focuses on doing the same with minimal setup.
- Raspberry Pi (Raspberry Pi 3 B+) running Raspbian Stretch (Nov. 2018)
- USB Microphone (SunFounder USB 2.0 Mini Mic)
- 3.5 mm plug Speaker (Rumfo Mini Speaker)
- PC for access to Raspberry Pi
Steps
1. Raspberry Pi Setup
1-1. Setup headress Raspberry Pi.
1-2. Connect the speaker and the microphone on Raspberry Pi.
1-3. Make sure the speaker is working. The command below can be used for speaker output test. To end the test, press Ctrl-C.
speaker-test -t wav
1-4. Check if the microphone is working. First, record some audio from the microphone by the command below.
arecord --format=S16_LE --duration=5 --rate=16000 --file-type=raw out.raw -D sysdefault:CARD=1
1-5. Next, play the recorded audio by the command below.
aplay --format=S16_LE --rate=16000 out.raw
If everything goes right, you can hear the recorded audio from the speaker. If the speaker output or microphone input is too low, you can adjust the gain with alsamixer.
alsamixer
2. Register Product Info
2-1. Open a web browser on PC and log in to Amazon Developer. Please sign up if you don’t already have the account.
2-2. Click on “GET STARTED” and then “CREATE PRODUCT”.
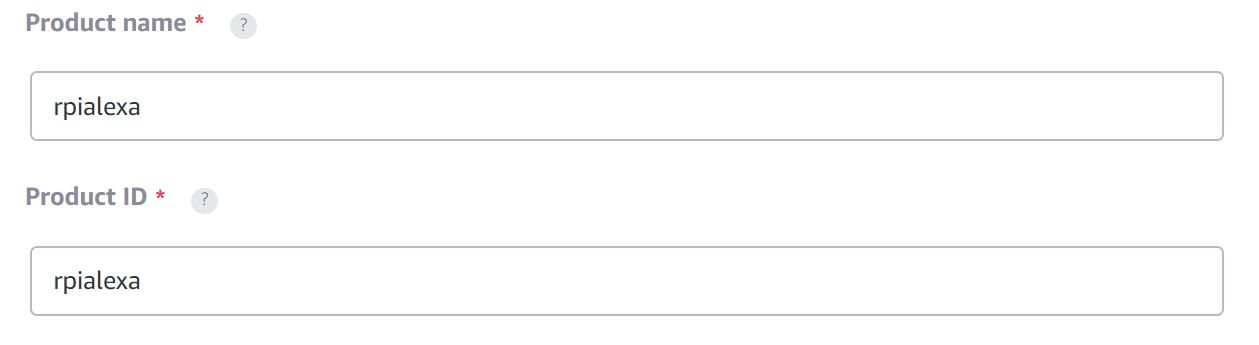
2-3. Enter “rpialexa” for both Product Name and Product ID.
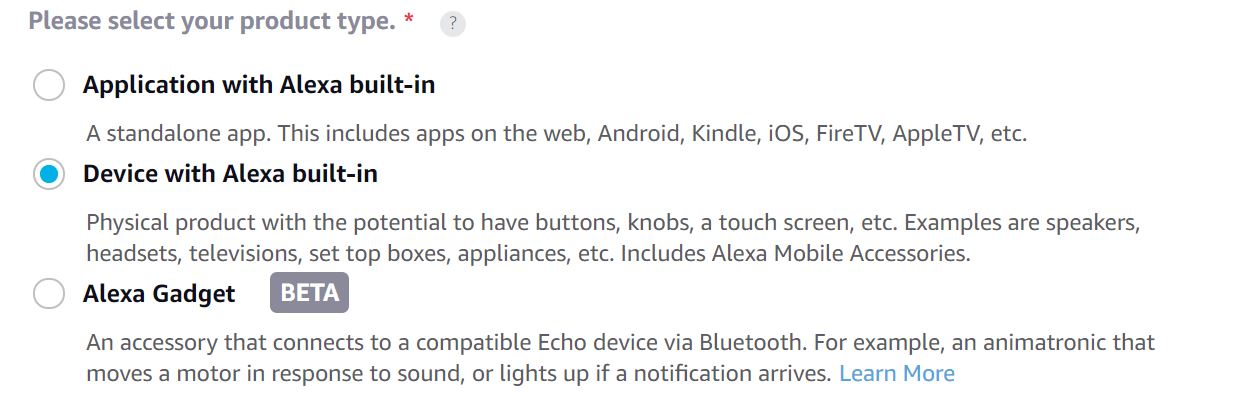
2-4. Check on “Device with Alexa built-in”.
2-5. Check on “No” for “Will your device use a companion app?”.

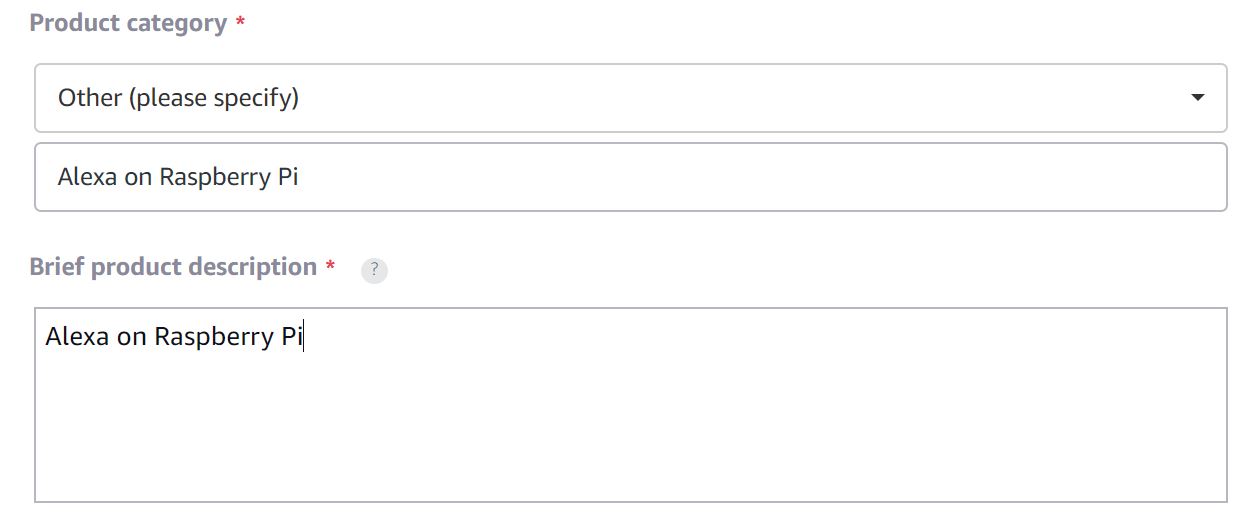
2-6. Select “Other” for “Product category” and enter “Alexa on Raspberry Pi” both for the category description and the product description.
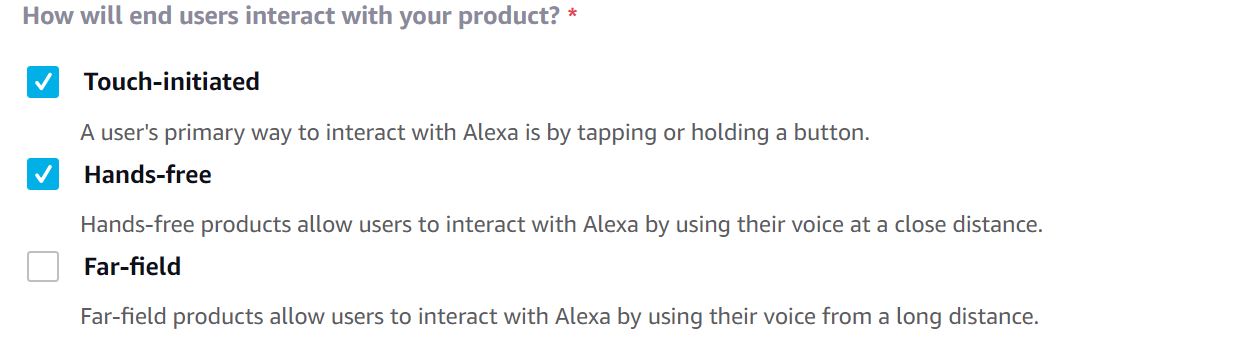
2-7. Check on “Touch-initiated” and “Hands-free”.
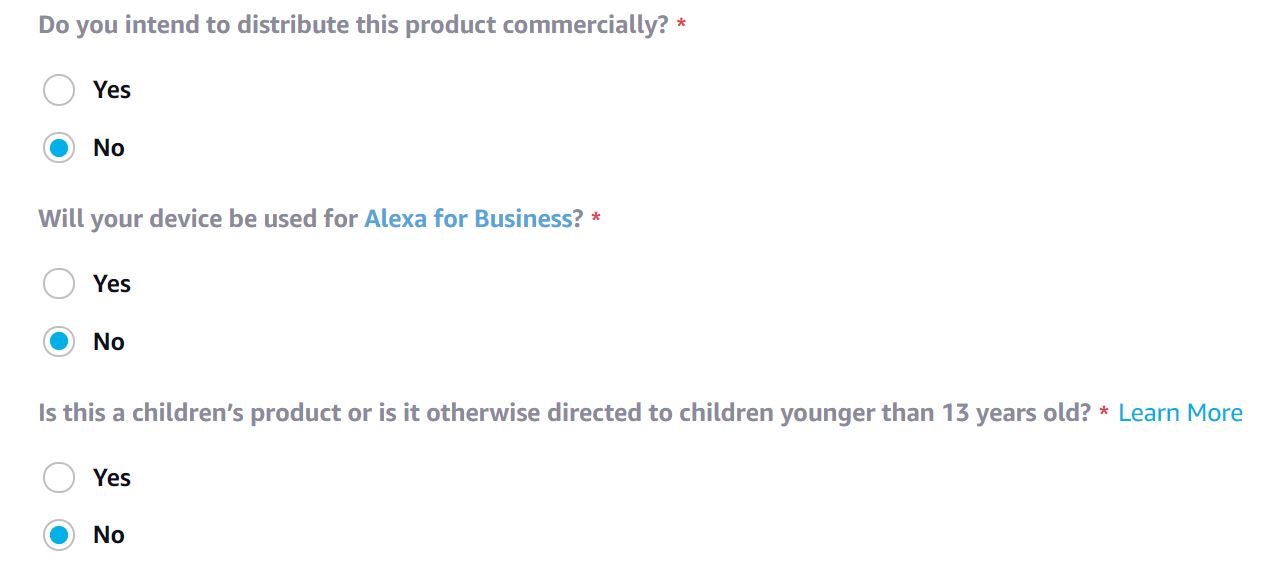
2-8. Skip the image section and check on “No” for the rest of the questions, then click on “NEXT”.
3. Create Security Profile
3-1. Click on “Create New Profile”.
3-2. Enter “rpialexa security profile” for “Security Profile Name” and “Security Profile Description”, then click on “NEXT”.
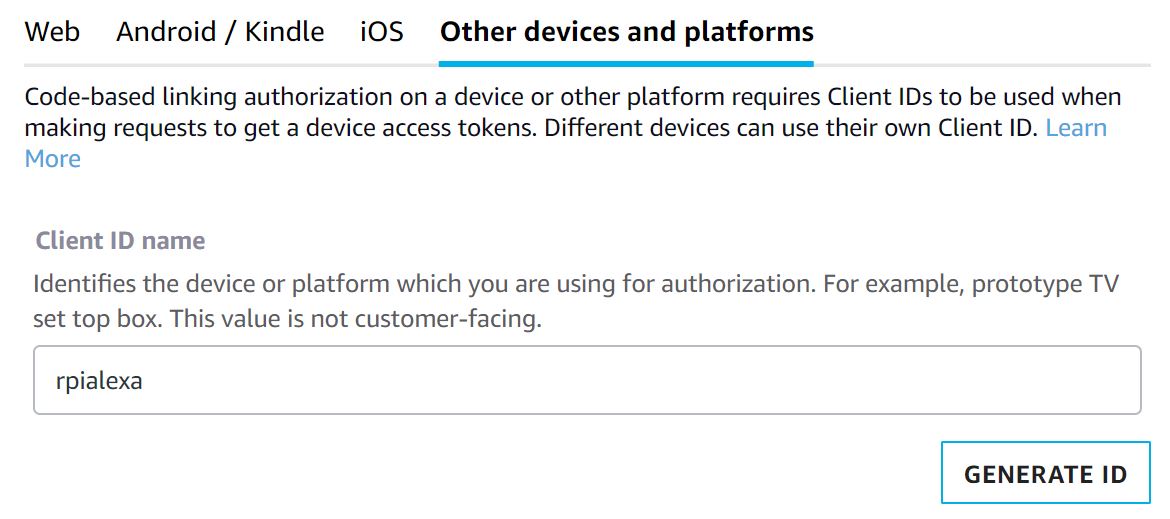
3-3. Select “Other devices and platforms” in “Platform information” section.
3-4. Enter “rpialexa” as Client ID name then clock on “GENERATE ID”.
3-5. Click on “DOWNLOAD”.
3-6. Copy downloaded “config.json” file to Raspberry Pi’s home directory. If you are using Linux PC, you can do it like below.
scp ~/Downloads/config.json pi@$RPI_IP_ADDRESS:~
3-7. Review the agreement and check on it, then click on “FINISH”.
3-8. Your will be prompted “Your product has been created”. Click on “OK”.
3-9. Open a web browser and access to Login with Amazon Console.
3-10. Select the security profile just created and click on “Confirm”.
![]()
3-11. Enter a privacy policy URL and click on “Save”. In this example, let’s use a fake URL below.
http://example.com
4. SDK Installation and Configuration on RPi
4-1. Make sure you are in home directory (or wherever you copied “config.json” to in step 3-6).
4-2. Download scripts.
wget https://raw.githubusercontent.com/alexa/avs-device-sdk/master/tools/Install/setup.sh
wget https://raw.githubusercontent.com/alexa/avs-device-sdk/master/tools/Install/genConfig.sh
wget https://raw.githubusercontent.com/alexa/avs-device-sdk/master/tools/Install/pi.sh
4-3. Run setup.sh with config.json.
sudo bash setup.sh config.json
4-4. Type “AGREE” when asked for licensing agreement.
4-5. Once setup is completed, run startsample.sh.
sudo bash startsample.sh
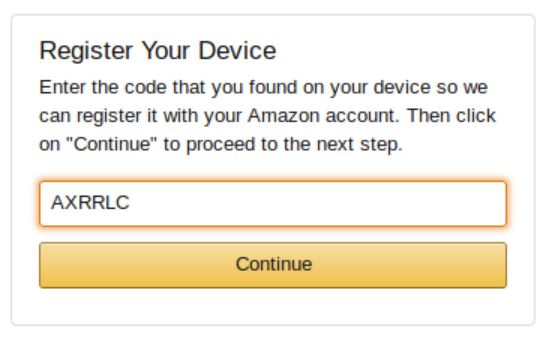
4-6. The script will show the line like below, then access the URL with a web browser, enter the code and click on “Continue”.
To authorize, browse to: 'https://amazon.com/us/code' and enter the code: {AXRRLC}
4-7. Select “Allow”. Then you’ll be prompted as below.

Also, you will be able to see the lines below in the terminal window. Now, Alexa is ready.
########################################
#       Alexa is currently idle!       #
########################################
5. Test
You can ask Alexa like
Alexa, what time is it?
References
[1] AVS Tutorials Prototype with Raspberry Pi – amazon alexa
[2] Raspberry Pi Quick Start Guide with Script – alexa/avs-device-sdk – GitHub
Thank you so much for documenting this, I was pulling my hair out trying to follow other guides to completion. Your instructions were up to date, accurate and easy to follow, made setting up Alexa on the Pi a breeze!
Thanks for your comment! I felt the same way, so I wanted to simplify the steps as much as possible. I’m grad it worked for you!
hello I have this error that appears that do:
Cloning in ‘alexa-rpi’…
fatal: remote error:
Repository not found.
Hi jordan,
I just tested with the command below and I was able to clone it. You might have a network issue, can you try again and check if it’s still failing?
Is this just running/cloning Alexa on the PI (just like a echo) or are the Alexa voice commands able to interact with the PI directly ?
thanks,
v.
I am struck at this: 4-5. Once setup is completed, run startsample.sh.
How do i get startsample.sh?
Please let me know the steps or way to get this.
Alexa is currently idle. Alexa is listening , thinking and speaking but sound not coming out from speaker , can u help me solving this issue